I was asked to upload over 1000 images, each image approximately 3768 pixels wide and upwards, mostly over 3MB in size. Instead of spending time resizing and saving each image individually, I found a quick solution to batch resize images to scale and then optimise for web use. I used a brilliant extension that gives you so many more options, it’s been a lifesaver.
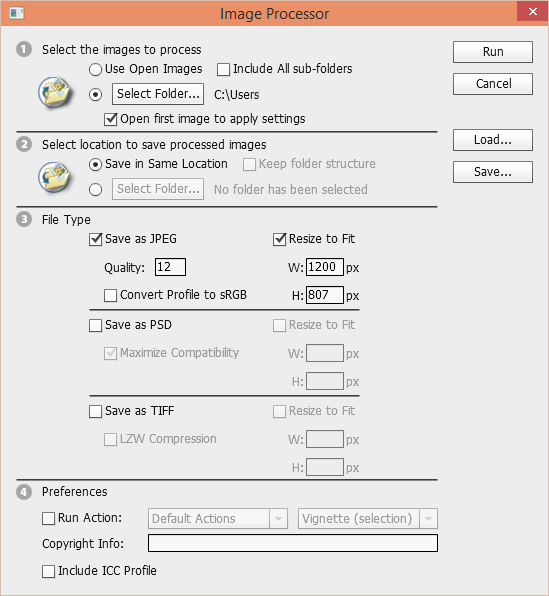
Here’s a look at Photoshop’s Image Processor without installing the extension:

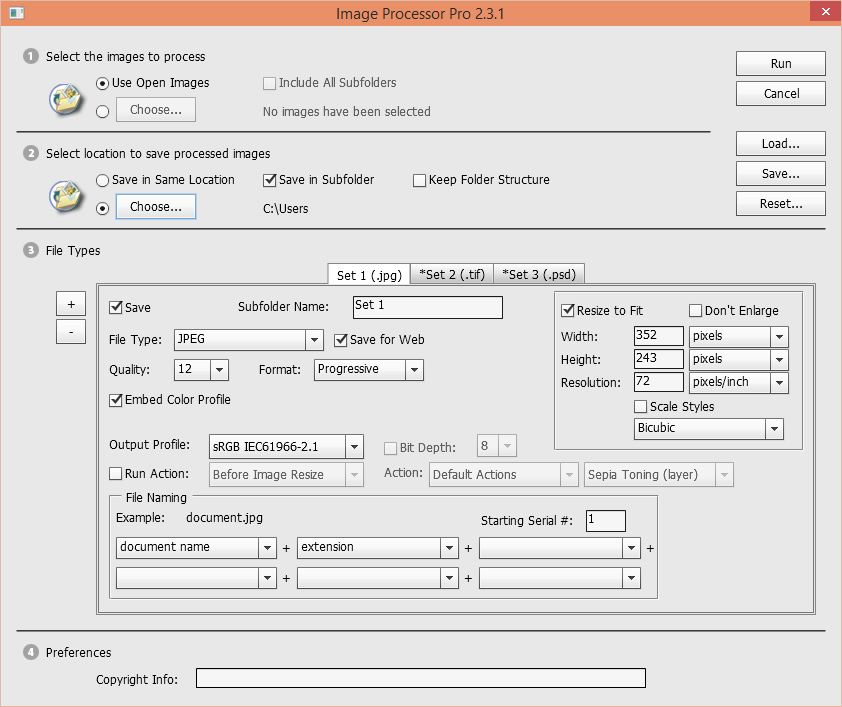
Here’s a look at the many additional options available after installing CS6/CC Adobe Photoshop Panels & Actions:

Let’s Get Started
- Make sure you have Adobe Photoshop and Adobe Bridge closed before moving on.
- Download CS6/CC Adobe Photoshop Panels & Actions and unzip the contents to a preferred location of your choice.
- Open Adobe Extension Manager with administrative privileges.
- Click on the ‘install’ button located at the top of the program, then navigate to the unzipped folder.
- Select the file named Services_Installer_2.3.1.zxp, then follow the instructions to install the script.
- Open up Photoshop, then navigate to the folder containing the images you’d like to resize and select them all.
- Go to File > Automate > Image Processor Pro.
- Make your selections, then click Run.
It’s that simple, enjoy!
If you need to rename all files within your current directory, to replace spaces in their names with underscores for example, please check out my Powershell Snippets article.
I’m impressed, I have tto admit. Rarely do I come across a blog that’s both educative and
engaging, andd without a doubt, you’ve hit the nail
on the head. The problem is something too feww people are speaking intelligently
about. I am very happy that I cme across this during my search
for something concerning this.